Origami Crane Tutorial
A beginner-friendly guide to folding a traditional origami crane.
About the course
About the course
Learn how to fold a traditional origami crane through guided practice and simple checks.
Lesson Goal
Complete a traditional origami crane and understand the key fold sequence.
Best for
Beginners with little or no origami experience.
What you need
One square sheet of paper.
Introduction to Origami Crane
Introduction
What will I learn?
- Basic folding flow for a classic origami crane
- How to keep folds neat and aligned
- How different stages build the final shape
Materials you will need
Materials
You need
One square sheet of paper. Thinner paper is usually easier for beginners.
Video Tutorial
Watch Before You Start
Watch this quick demonstration before beginning Step 1.
Step by Step Tutorial
Step 1
Start with a square sheet
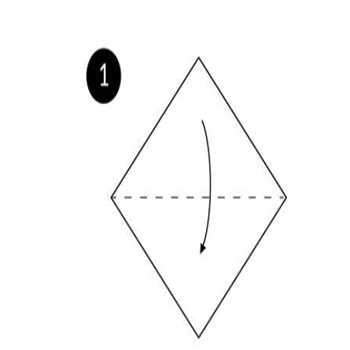
Place your square paper flat on the table with one corner pointing upward.
Step by Step Tutorial
Step 2
Fold diagonally
Fold the paper in half diagonally to form a triangle, then crease firmly.
Step by Step Tutorial
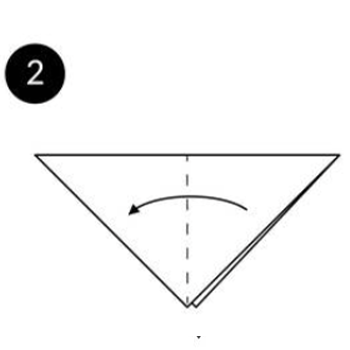
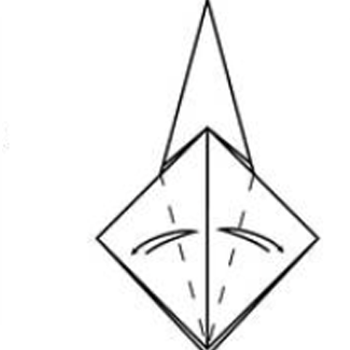
Step 3
Unfold and fold the other diagonal
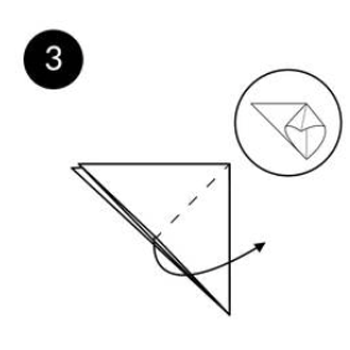
Open the fold and bring one side up
Step by Step Tutorial
Step 4
Fold horizontally
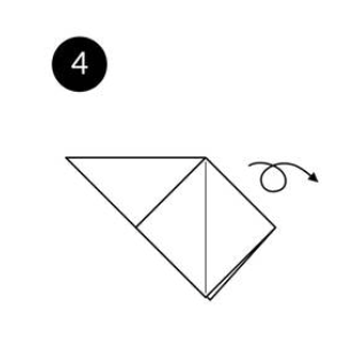
Turn the model over
Step by Step Tutorial
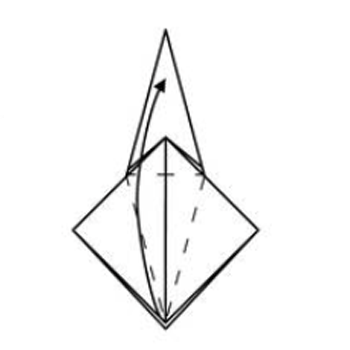
Step 5
Collapse into a square base
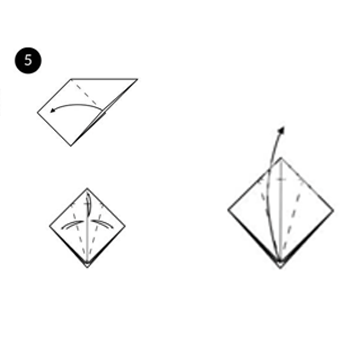
Use the creases to push the paper inward and collapse it into a smaller square shape.
Phase 1 Complete
Nice progress
You have completed the base folds. Next, you will shape the body, neck, and wings.
Step by Step Tutorial
Step 6
Fold the side edges inward
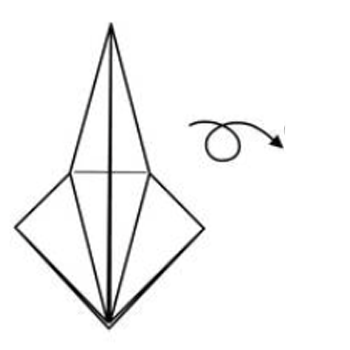
Turn the model over
Step by Step Tutorial
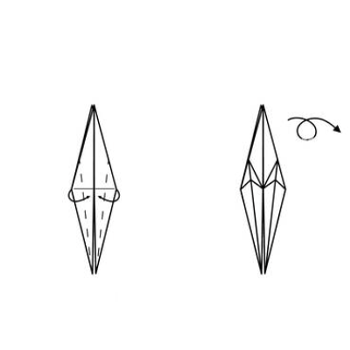
Step 7
Fold the top flap down and unfold
Fold both sides inward
Step by Step Tutorial
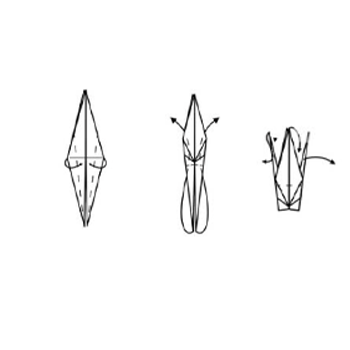
Step 8
Lift the bottom point upward
Lift the bottom point upward
Step by Step Tutorial
Step 9
Repeat on the other side
Repeat on the other side
Step by Step Tutorial
Step 10
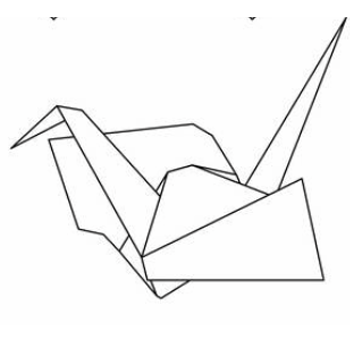
Form the neck, tail, and wings
Form the neck, tail, and wings
Phase 2 Complete
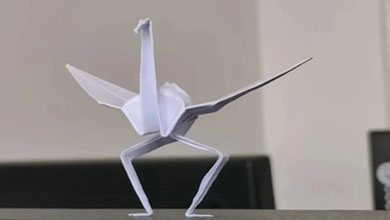
You finished the crane
Great work. Before generating your certificate, complete a quick knowledge check and self-assessment.
Knowledge Check
Knowledge Check
Self-Assessment
Self-Assessment
Almost Done
Certificate Name
Enter your name to generate your completion certificate.
The button will activate after you enter your name.
Completion
Congratulations
Certificate of Completion
This certifies that
has successfully completed the Origami Crane Tutorial.